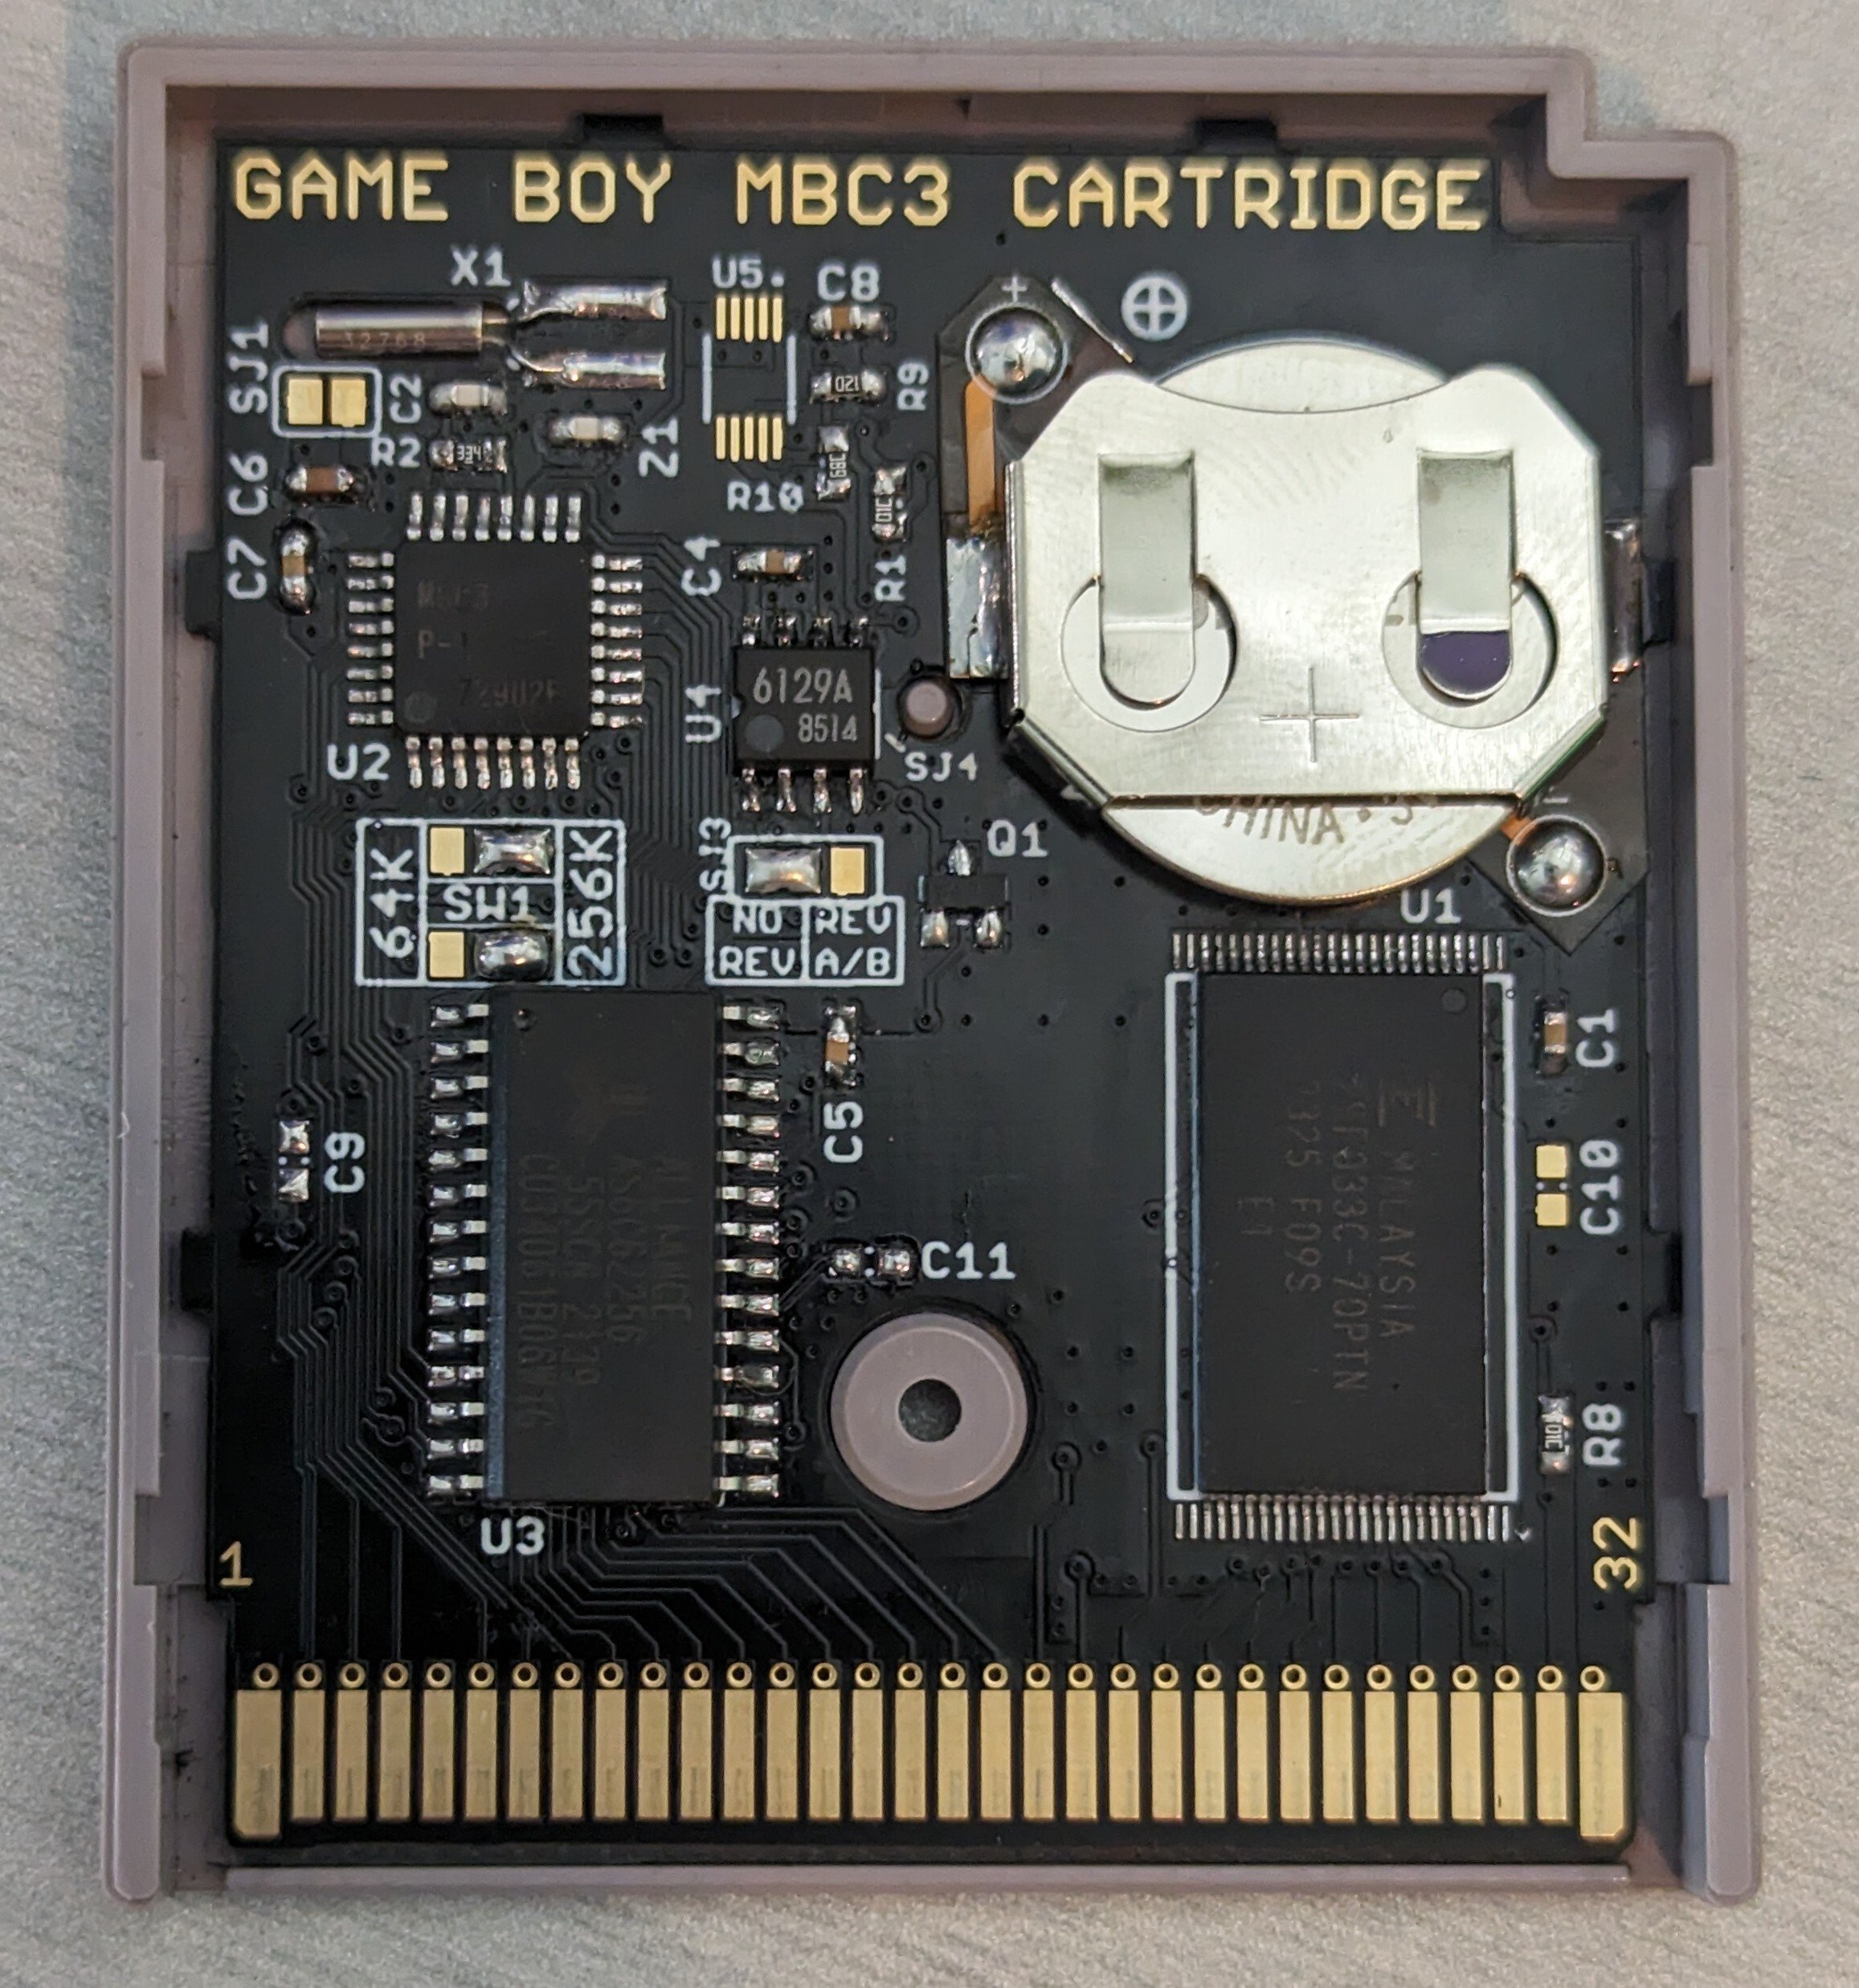
 . 3 MBC1, 1 MBC3, and 1 MBC30

. 3 MBC1, 1 MBC3, and 1 MBC30
I happen to have a board from my FunnyPlaying build so I figured I'd give it a shot. Used enamel wire to make the button contacts and got 3.3v from the cart slot. I also removed the caps as to not power any circuits that didn't need (CPU and RAM were donors to the other board). Power is provided via AA batteries.
Still very much a work in progress but it works reasonably well (about 8ms of lag). I want to ultimately create an easier to install PCB rather than the perfboard I used.
Took a badly marginal gba pcb and transplanted the CPU and RAM into this new motherboard. The soldering was a nice challenge but I had an issue with the cart slot. A pin was bent, so had to fix that before games would boot. Very happy with the result. I've uploaded a picture of the back of the shell as well. https://imgur.com/a/opXFA5B
Also in person, the plastic is not cloudy at all. The motherboard is here https://funnyplaying.com/products/gba-custom-upgraded-motherboard-replacement?variant=40990162059325

Printed using hatchbox wood pla. I had a few issues with standoffs but a little glue fix those right up. I'm very happy with the way it turned out. Just waiting on the release of flippy drive to call it complete.
Links to all the models I used:
https://www.thingiverse.com/tessa-wolf/designs https://www.printables.com/model/469283-gamecube-jewel https://www.printables.com/model/117561-gamecube-power-button https://www.printables.com/model/280005-gamecube-reset-button https://www.thingiverse.com/thing:2644517

Neat. I'll have to check these out later on the TV.
And many other systems and arcade games (SNES, NES, Genesis, GameGear, Super Gameboy, Simpsons arcade game, galaga, etc...)
Just to add to the math, it really depends on what you own already and your capabilities to install mods yourself. Buying 3 pixelfx HDMI mods (shiny editions) will cost you around the same as the 4k (and that's if you can install yourself). Same thing as the analogue consoles if you want individual systems to play cartridges.
To add to the quality aspect, I have a 4k and I compared my RGB N64, HW1 N64Digital HDMI and RGB outputs, and Mister core as soon as I got it. The 4k looks better on my OLED than the HDMI output of the mod, with the only exception being if you prefer the smoothing filter in certain games.
No, UV printed is still the correct term. For 3D printing, "resin printed" is the more common term.
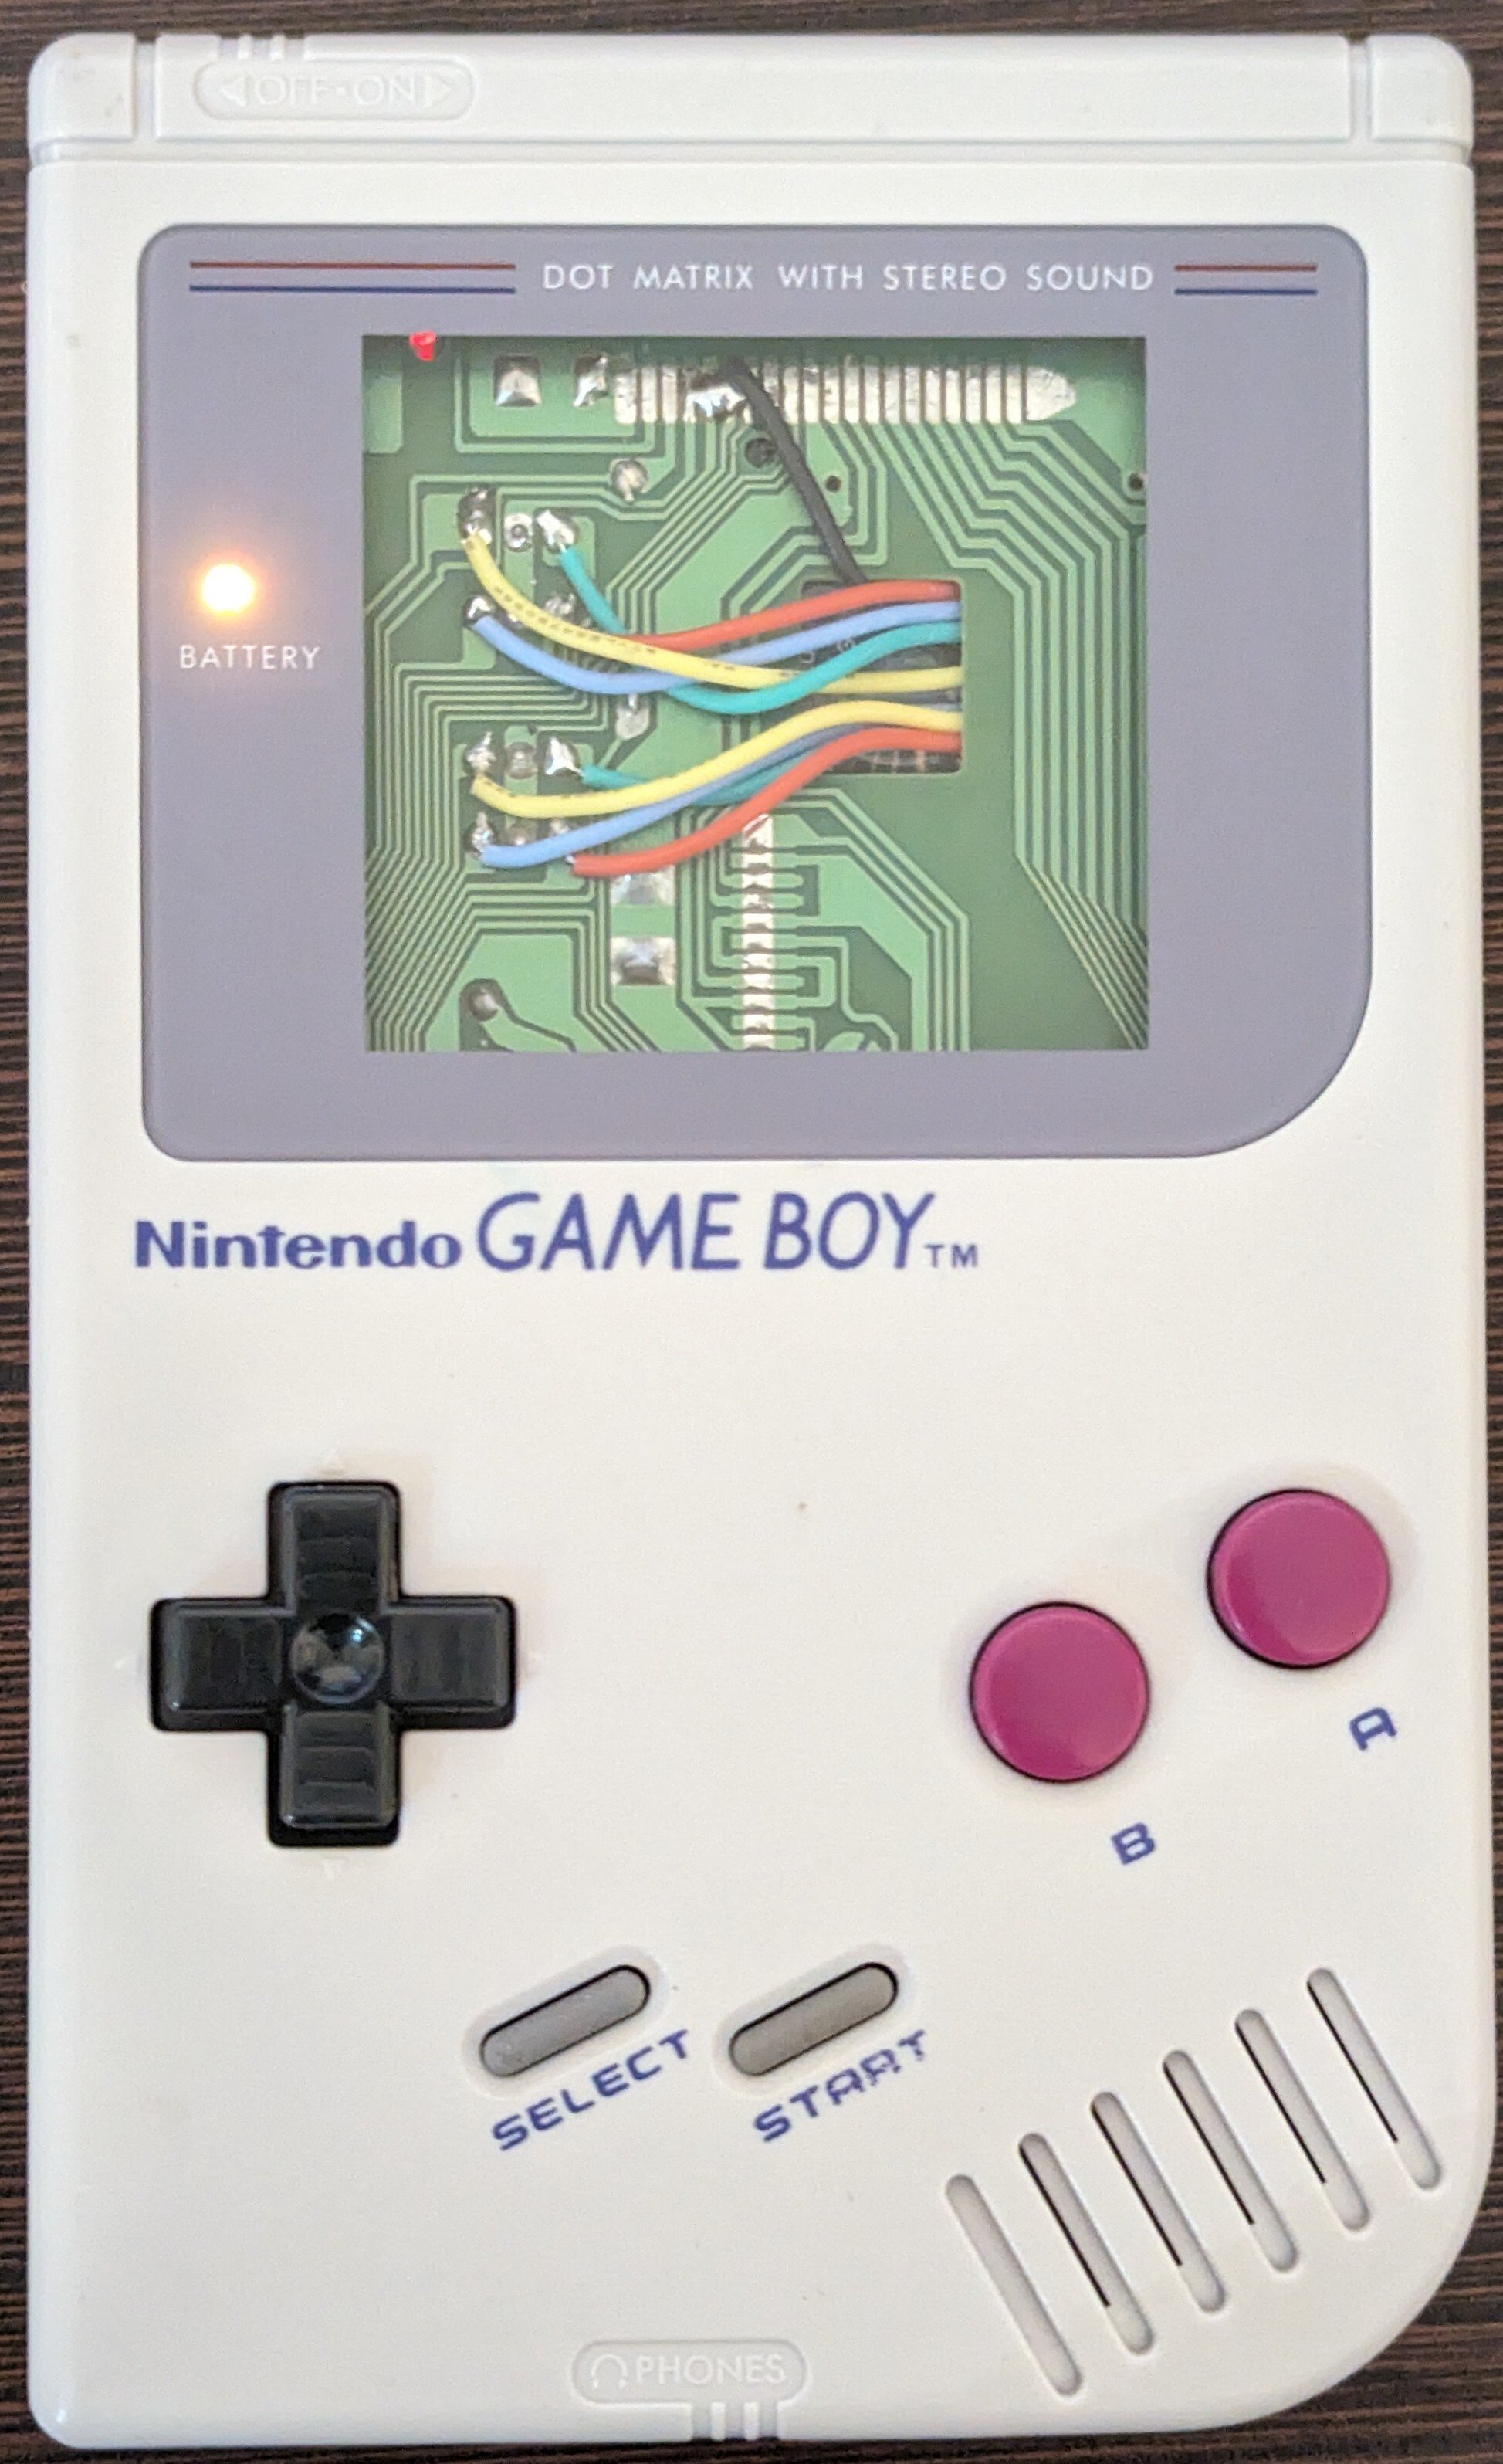
UV printing is a way to print designs on plastic and other materials (special ink is applied to the surface and cured with UV light). This shell was definitely injection modeled, not 3D printed. I'm pretty sure the shell itself is this one.
Haha thanks. I debated on which picture to use, I settled on this one mainly because I was so impressed with the UV print quality, though LEDs are great for those sweet, sweet internet points.
UV printed shell, new battery, button LEDs, and new screen.
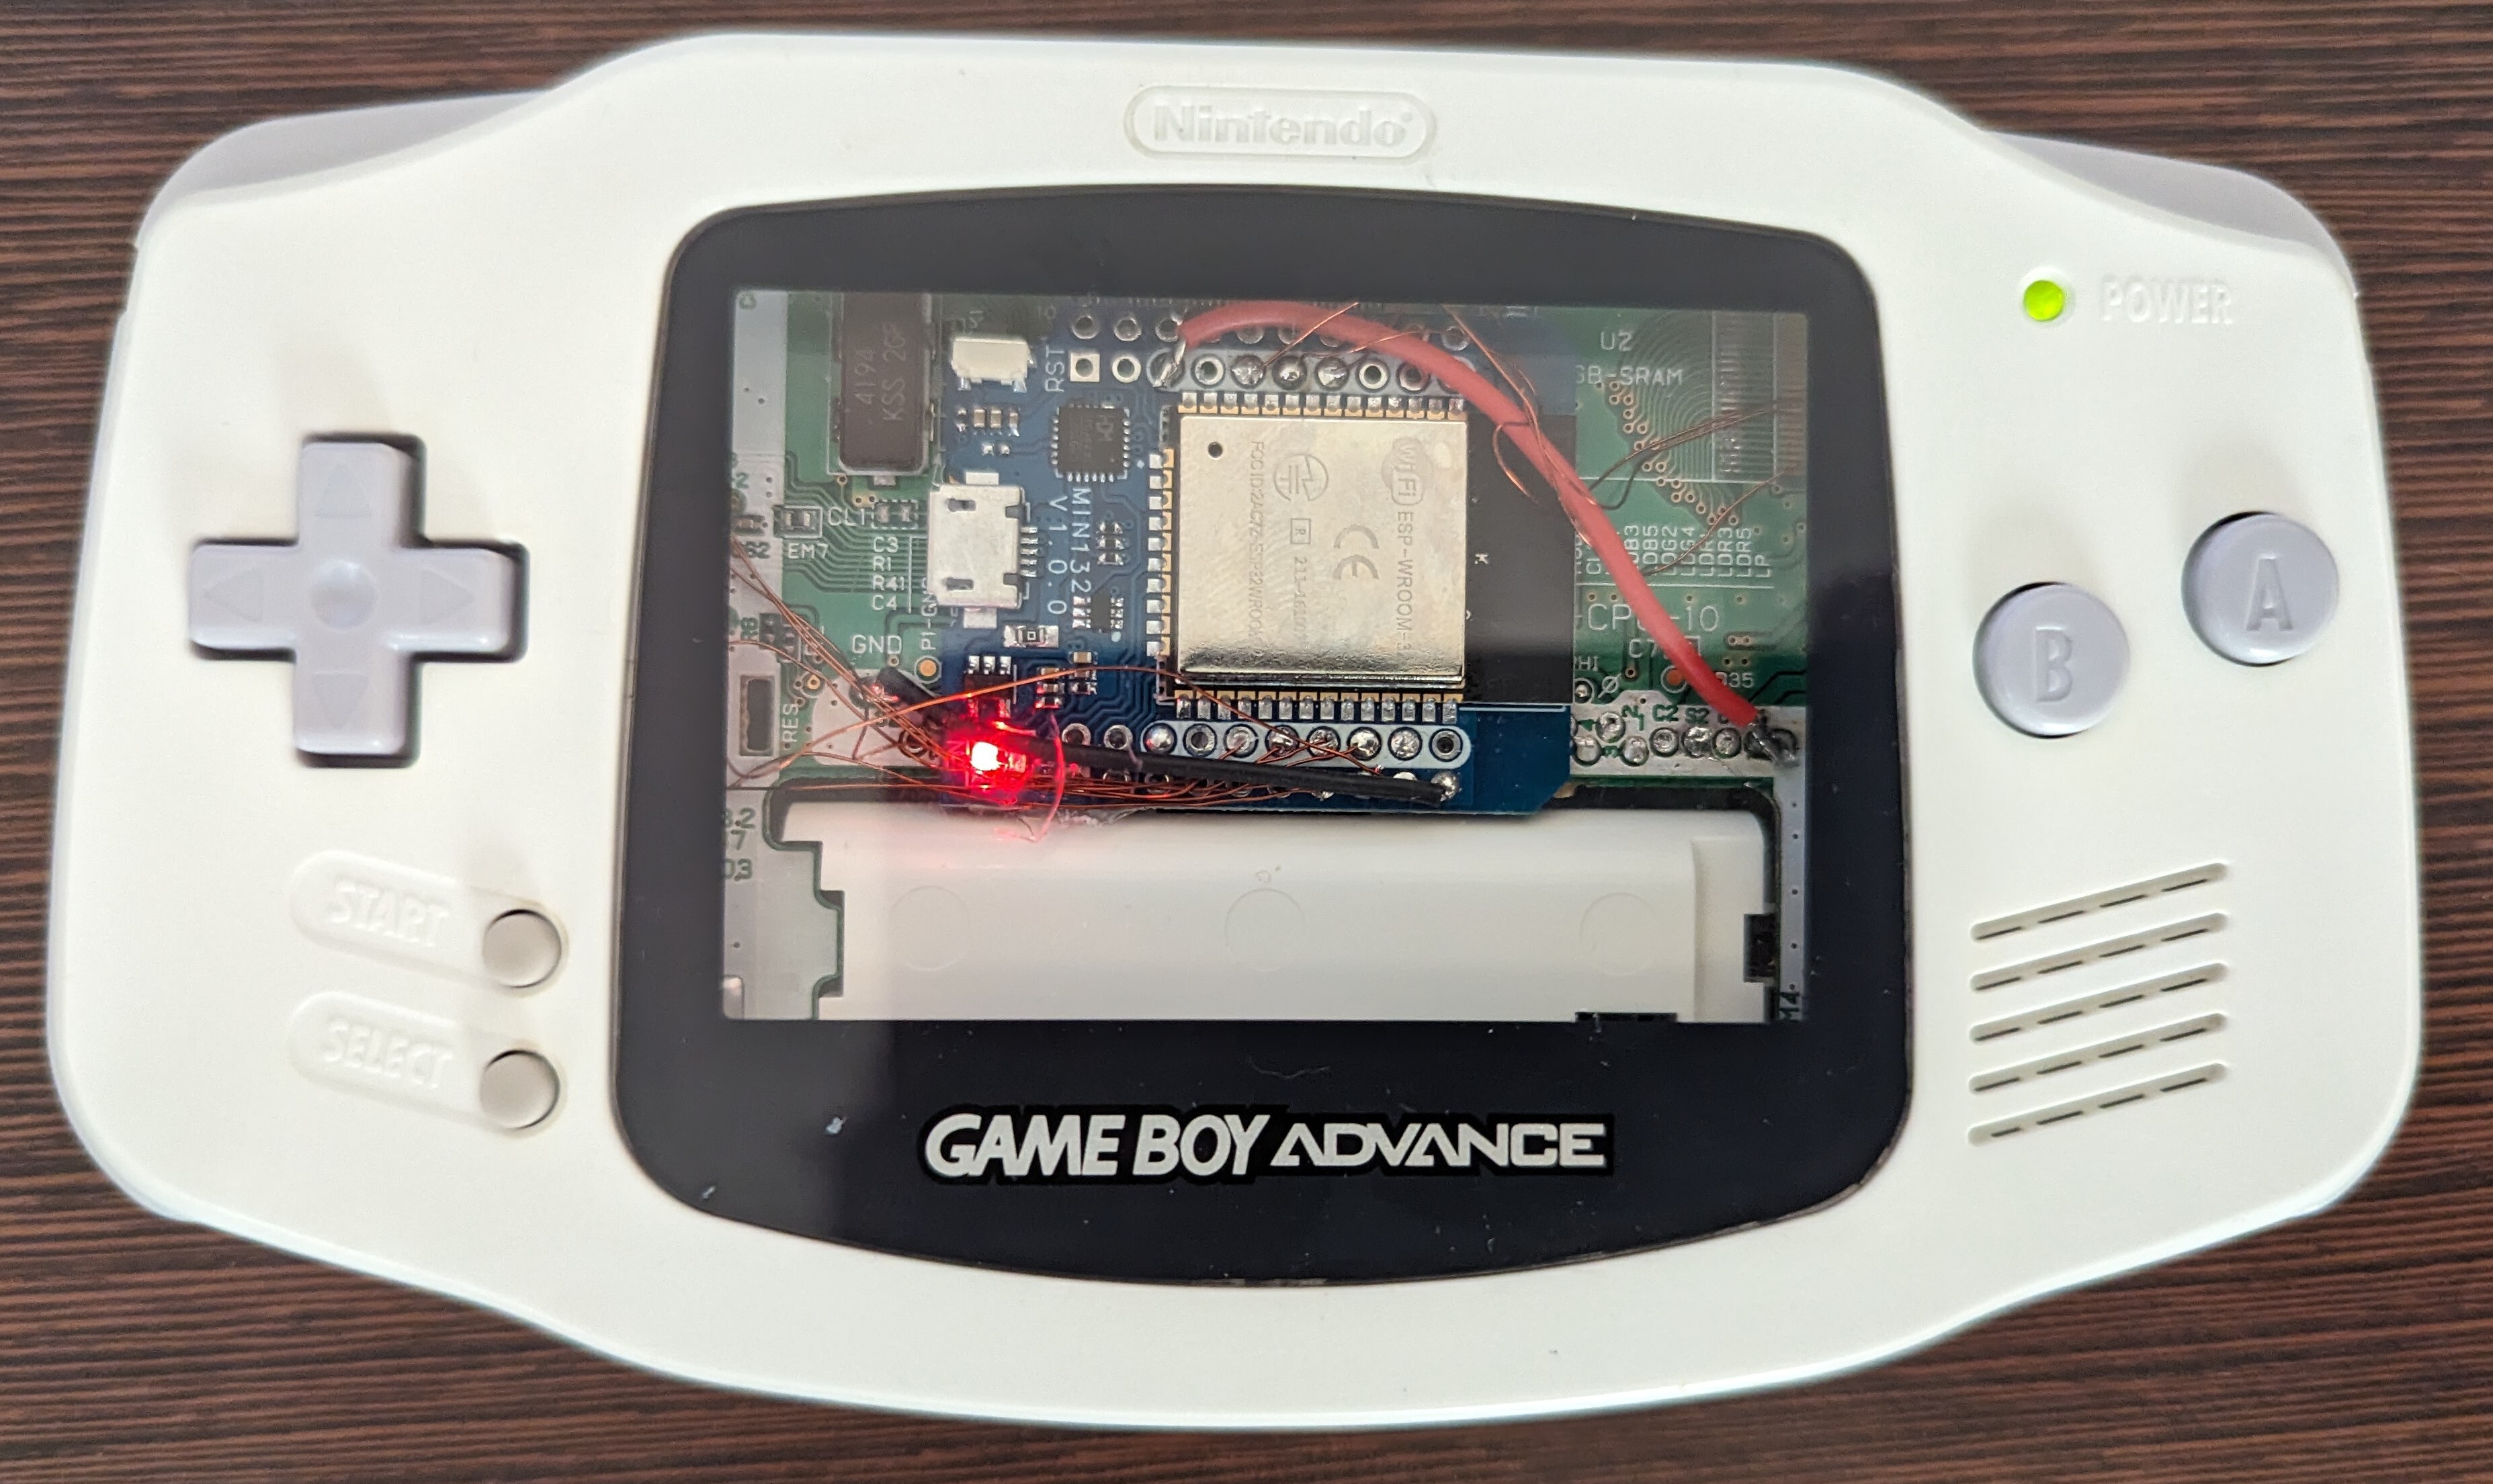
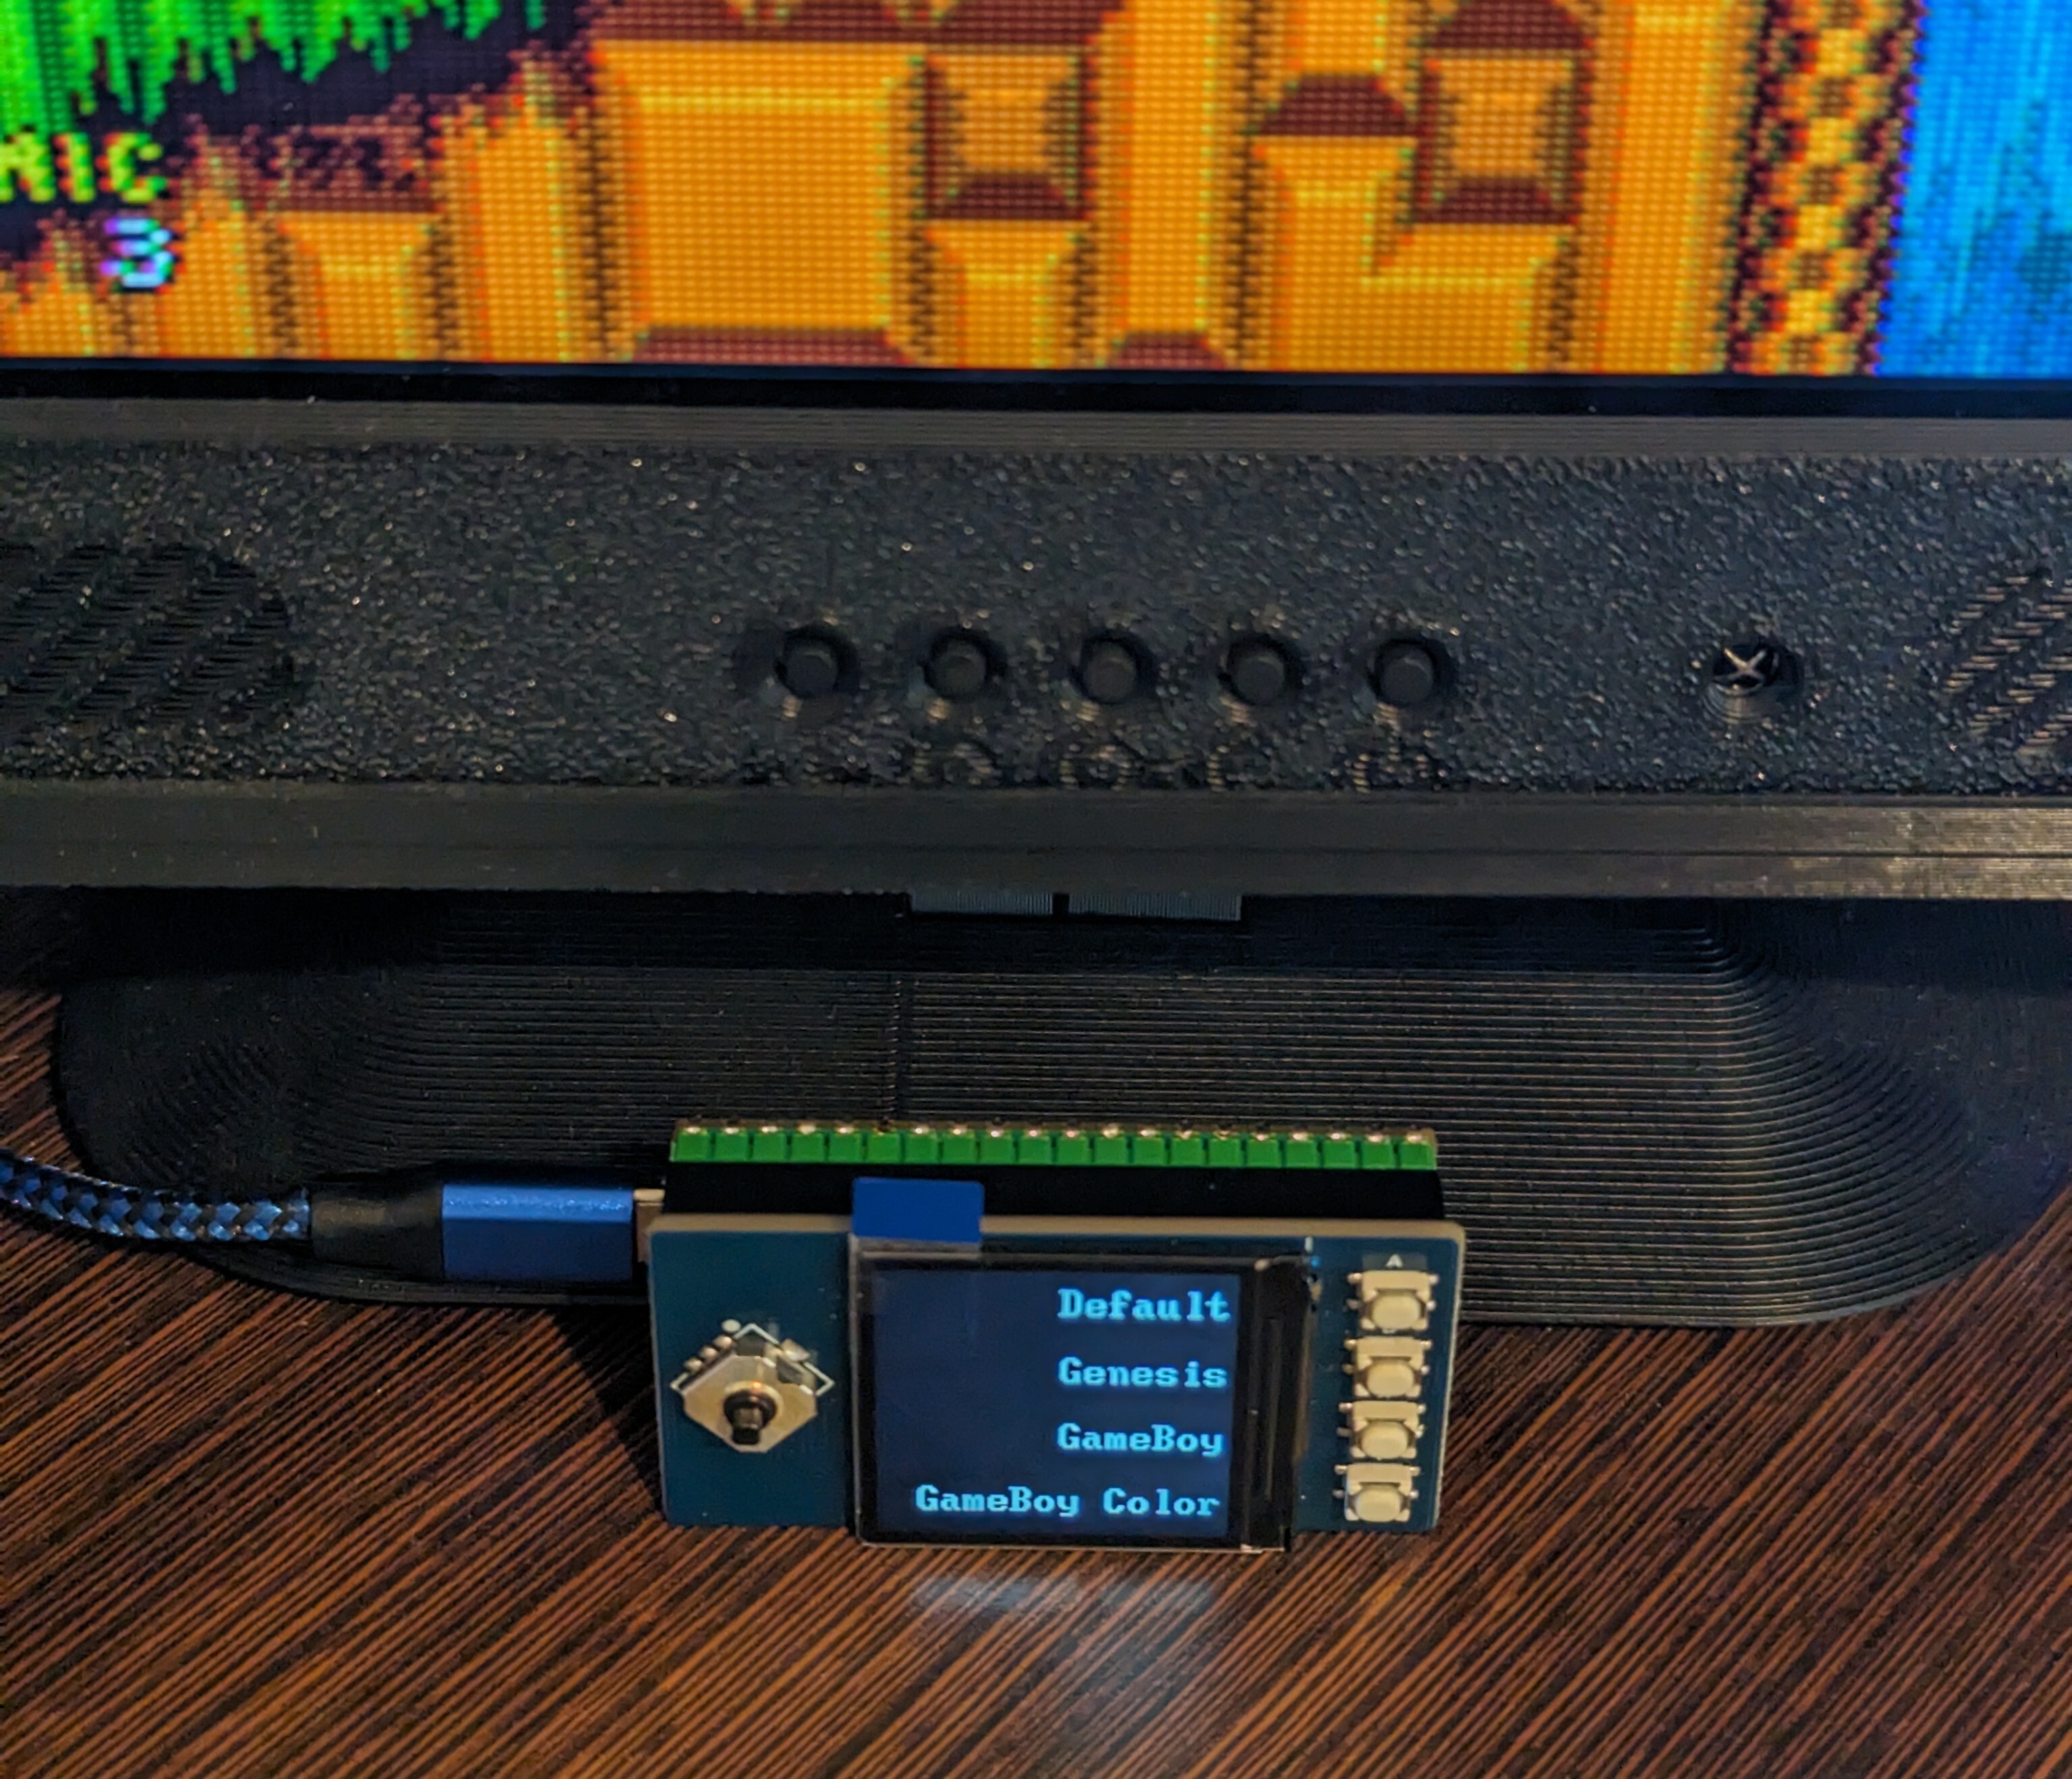
It is and its from laserbear. I actually think the pocket dock looks better on this little display vs a larger monitor. The downside is you have to use a scaler to get a proper image from the dock (in this case 480p HDMI -> component -> gbscontrol -> display).
Yeah if you go the diy route for the gbscontrol it can be a little intimidating without some prior experience. For this project if you get a Pico with headers already soldered, then no soldering is required which should hopefully be useful for people who just bought one off alliexpress.
This is a small project I'm working on for the gbscontrol. It functions as a remote to change saved profiles via wifi using a Raspberry Pi Pico W. With the addition of filters to the analogue pocket dock, I wanted to be able to quickly change presets without having to launch the web UI. When its ready, it will be fully open sourced.
What's working well:
What needs improvement:
The best guess is BOM cost. It's using an RP2050 and esp32 to emulate the drive. Most other solutions are using a FPGA, which is going to be more expensive.
Added a 3d printed shell and label
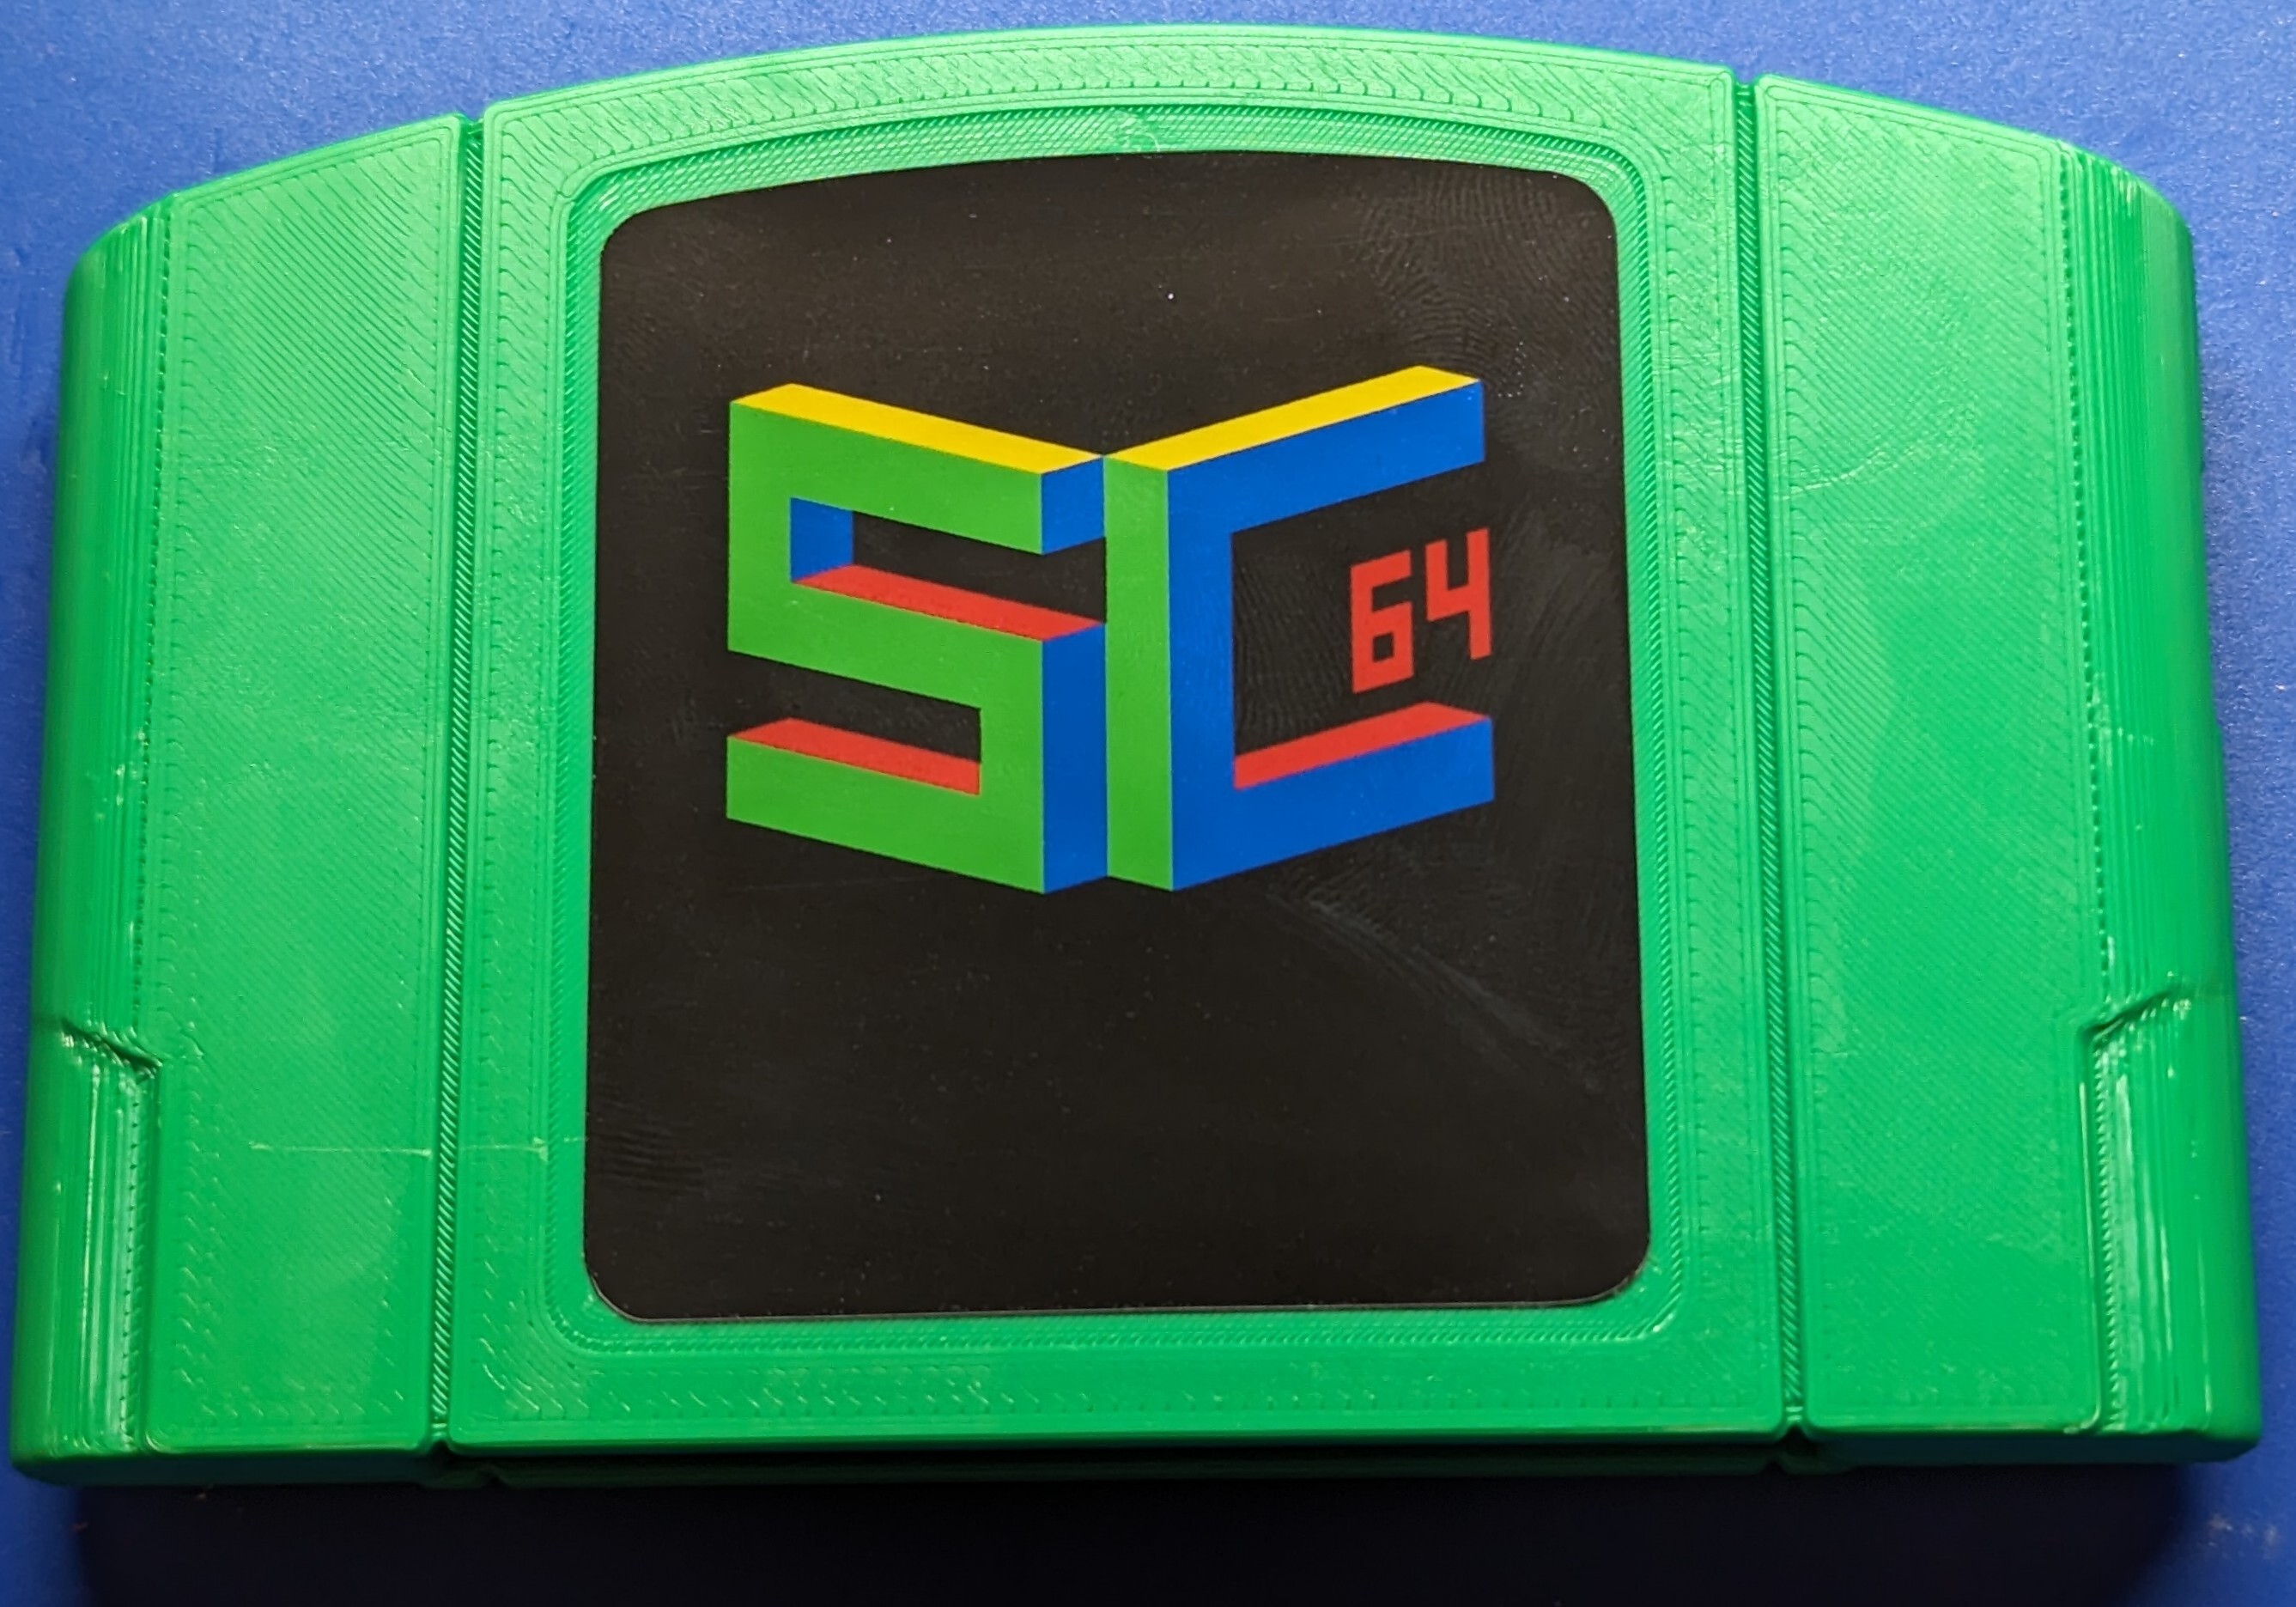
The project can be found here. It's feature set is comparable to x7 including no reset saving, game id compatibility with hdmi mods, emulators, and a rtc. Can be built for under $100.

Why wait?
https://www.theoaklandpress.com/2023/04/23/riverside-county-sheriffs-investigators-lose-60-pounds-of-meth-in-failed-drug-sting/
https://www.npr.org/2021/10/06/1043651361/oath-keepers-california-sheriff-chad-bianco-january-6-us-capitol
https://ktla.com/news/local-news/deputy-caught-with-100-pounds-of-fentanyl-was-working-for-el-chapos-cartel-report-says/amp/